The Classic Chocolate Chip Cookie

Hello! Long time, no see. I’m sorry for the break in-between posts; life happens. Thankfully the children are all at school for the first time in years, which means I finally get to complete my day job in a timely manner and can put my spare time back into the blog.

Since I now get a few precious moments to myself, and the weather is turning colder, I thought this would be a good time to explore the history of a tried-and-true classic, the chocolate chip cookie.

I love a chocolate chip cookie. While writing the first draft of this article there were no less three different bakery boxes on my kitchen counter containing cookies and a few dozen more in my freezer. I spent literally two months taste-testing chocolate chip cookie recipes during the 2020 lockdown to find the family favorite.  (Spoilers: it’s Alton Brown’s, followed by Stella Parks for a more sophisticated flavor).

So, without much further ado, let’s bring out the cookies.

The chocolate chip cookie was invented by Ruth Wakefield and her kitchen partner, Sue Brides.

Born in 1903 Wakefield attended Framingham State Normal School and graduated from the Department of Household Arts in 1924. During her time there she experimented with food, notably, with chocolate’s reaction to heat. Wakefield worked as a dietician and lectured on foods before buying a house with her husband in 1930 and turning it into the Toll House Inn. (I think you see where this is going.) The restaurant got its name not because it was an old toll house, but because it was “in the vicinity of the building used to collect tolls from those traveling between Boston and New Bedford.”

Wakefield set to work using her food knowledge for the greater good, and soon the restaurant became incredibly popular. It is said that celebrities such as Bette Davis and Eleanor Roosevelt ate at the restaurant.

In 1938, cookie magic happened. Toll House cookies had become incredibly popular. Legend has it that once when Wakefield was baking cookies, she ran out of nuts, so she substituted chocolate chips, expecting them to melt and create a chocolate cookie. Wakefield has rebuked this, stating that she knew what would happen with the chocolate after her time in college, and that she wanted to create something different than their popular butterscotch cookie. “We had been serving a thin butterscotch nut cookie with ice cream. Everybody seemed to love it, but I was trying to give them something different. So I came up with Toll House cookie.”

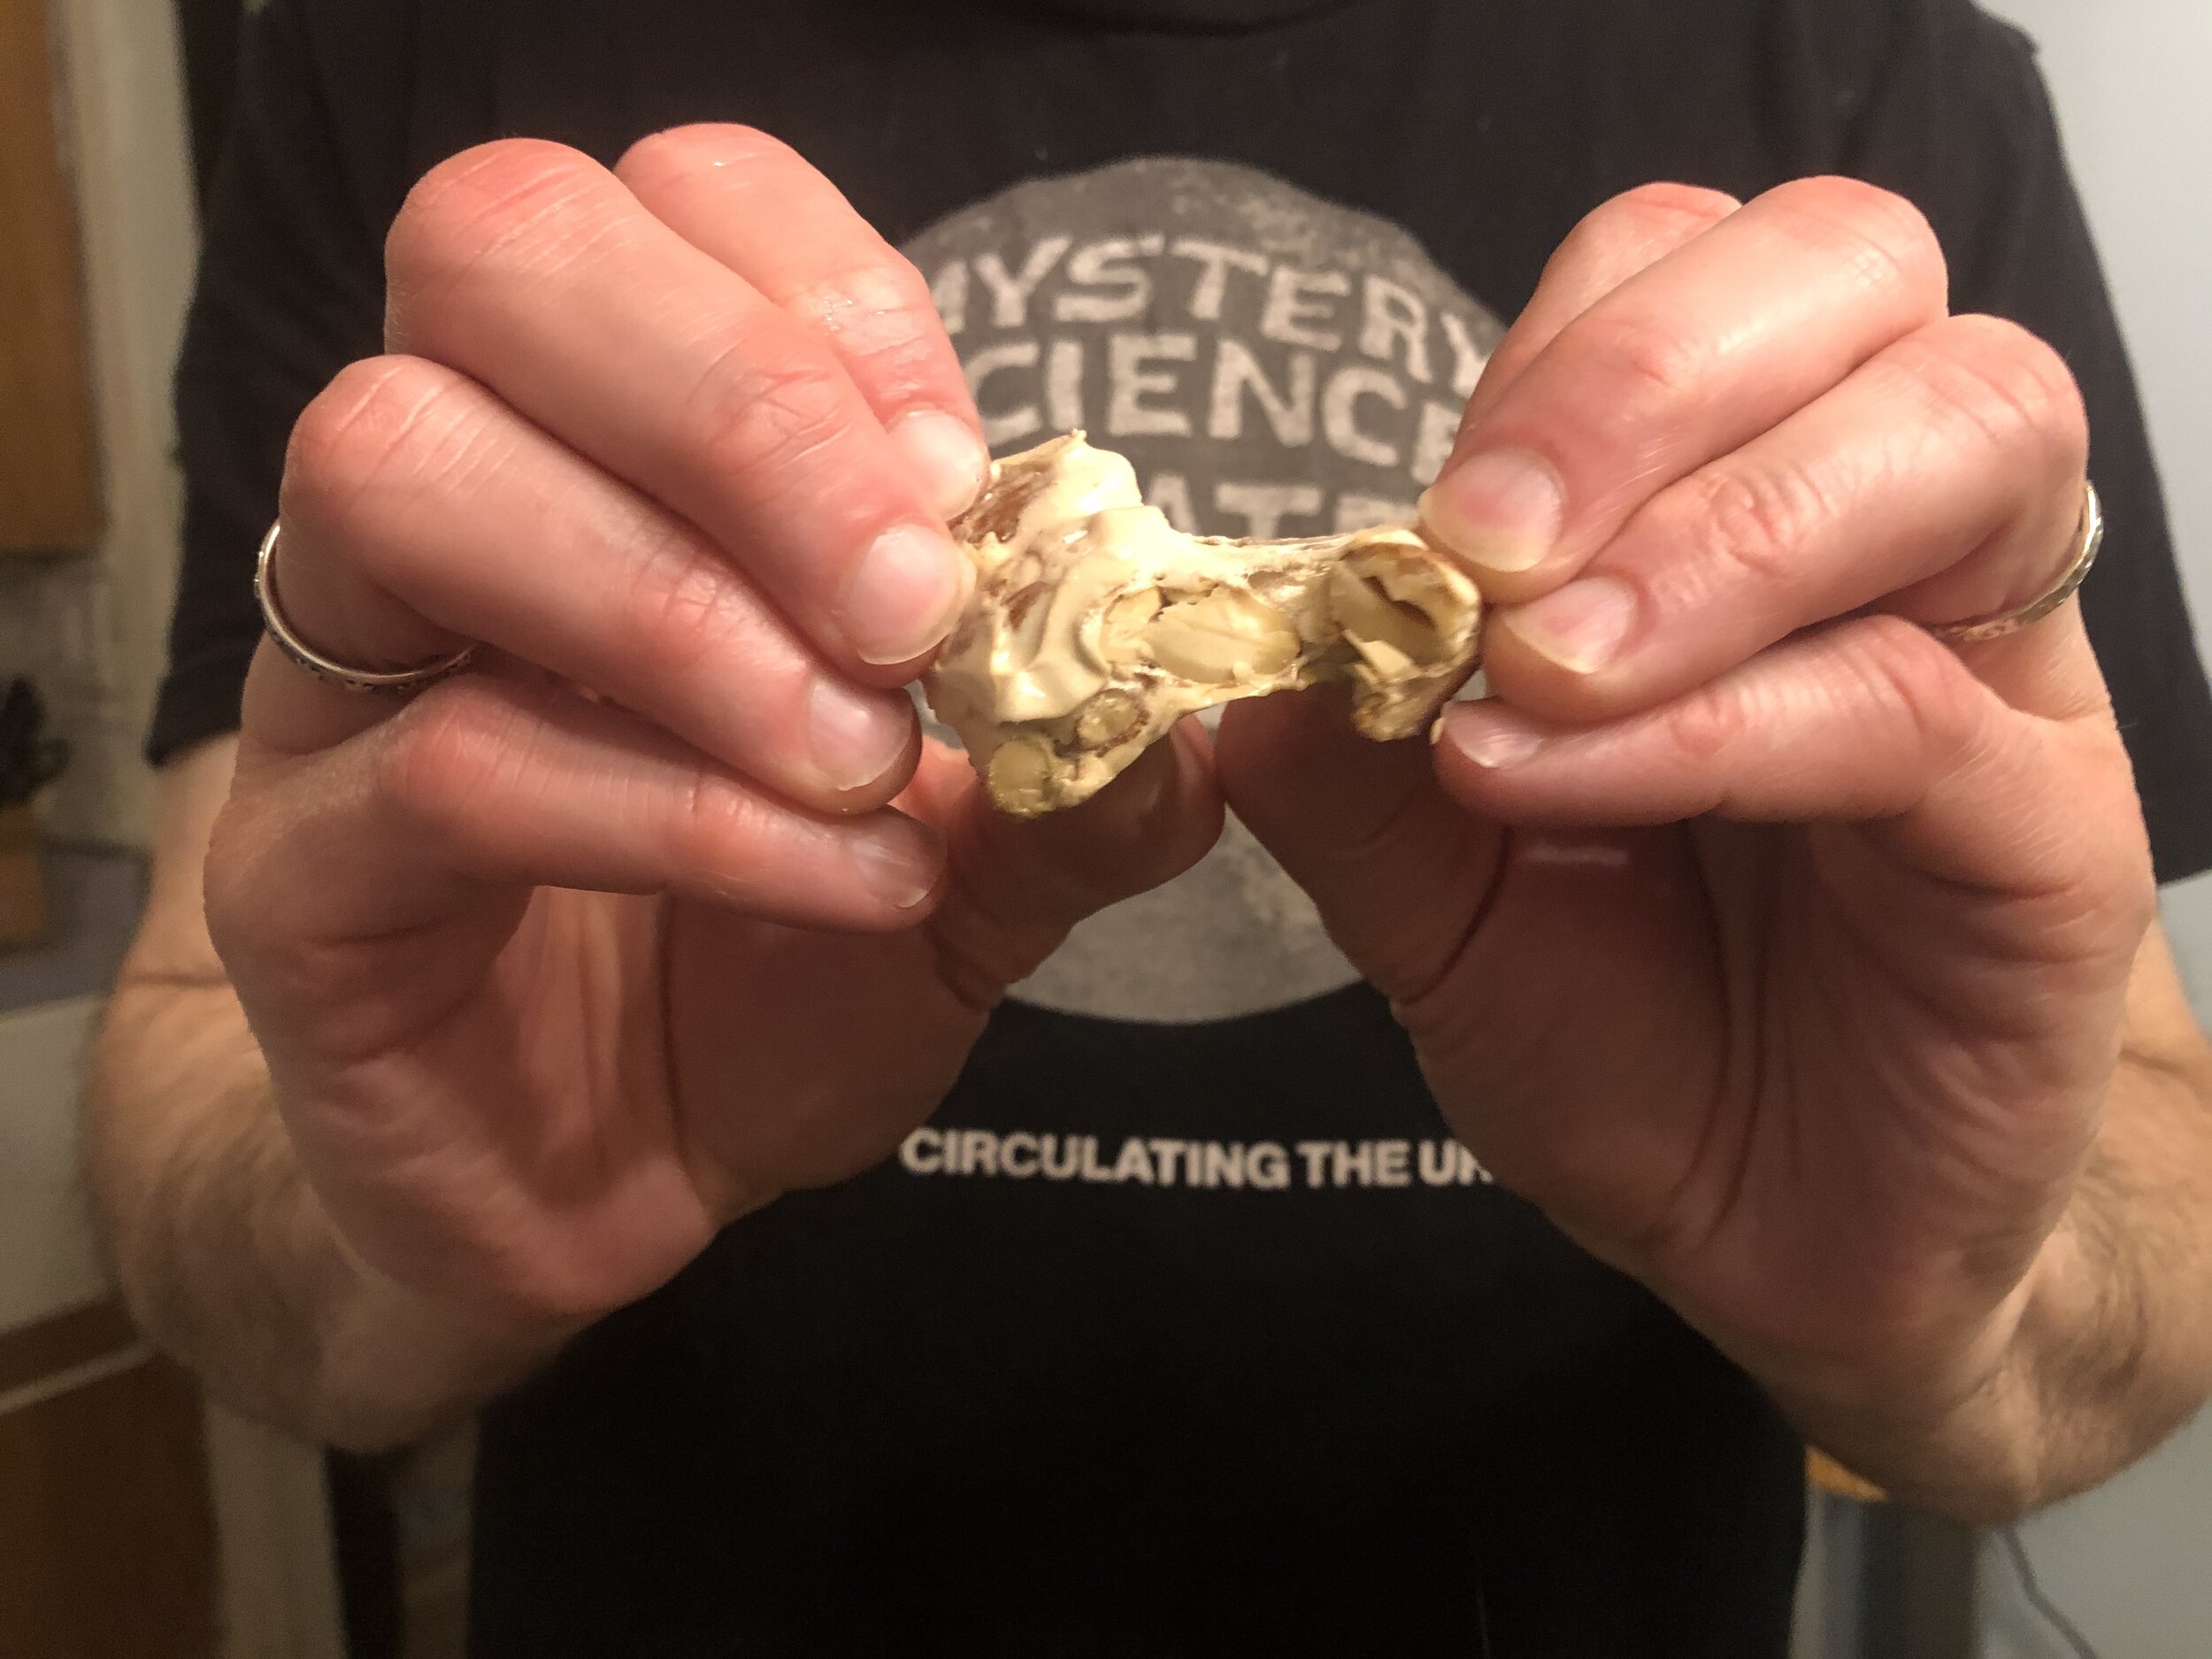
This is supported by the fact, that much to my dismay, the original cookie recipe does include nuts. Ick.

Either way, with help from her baker Sue Bridges, they created the “Toll House Chocolate Crunch Cookie” using chopped-up semi-sweet Nestlé bars. The cookie was a smash hit, and with the publication of the 1939 Toll House Tried and True Recipes, which included the chocolate chip cookie recipe, Nestlé chocolate bar sales skyrocketed. 

GUEST_fe65a944-98e4-45da-be12-0ac6c8cfffaa.jpeg

Nestlé took note of this upswing in sales and began creating and marketing bags of pre-chipped chocolate specifically for the cookies. After reaching out to Wakefield, they secured the rights to the recipe and started including it on the back of each bag of semi-sweet chocolate chips. In payment, Wakefield received a lifetime supply of chocolate. I’m pretty sure that Nestlé made out better in this situation.

Screen Shot 2021-10-07 at 2.27.19 PM.png

The Nestlé Toll House Chocolate Chip cookie has become the generic imagery of a cookie in America. cookie monster eats chocolate chip cookies. If you do a simple google search for “cookies” most of the results are of chocolate chip cookies.

There is now doubt that the chocolate cookie has captured the hearts and minds of Americans since its invention, and subagent commodification, less than 100 years ago.

And now, without further ado, the Classic Nestlé Toll House Cookie.

The Recipe:

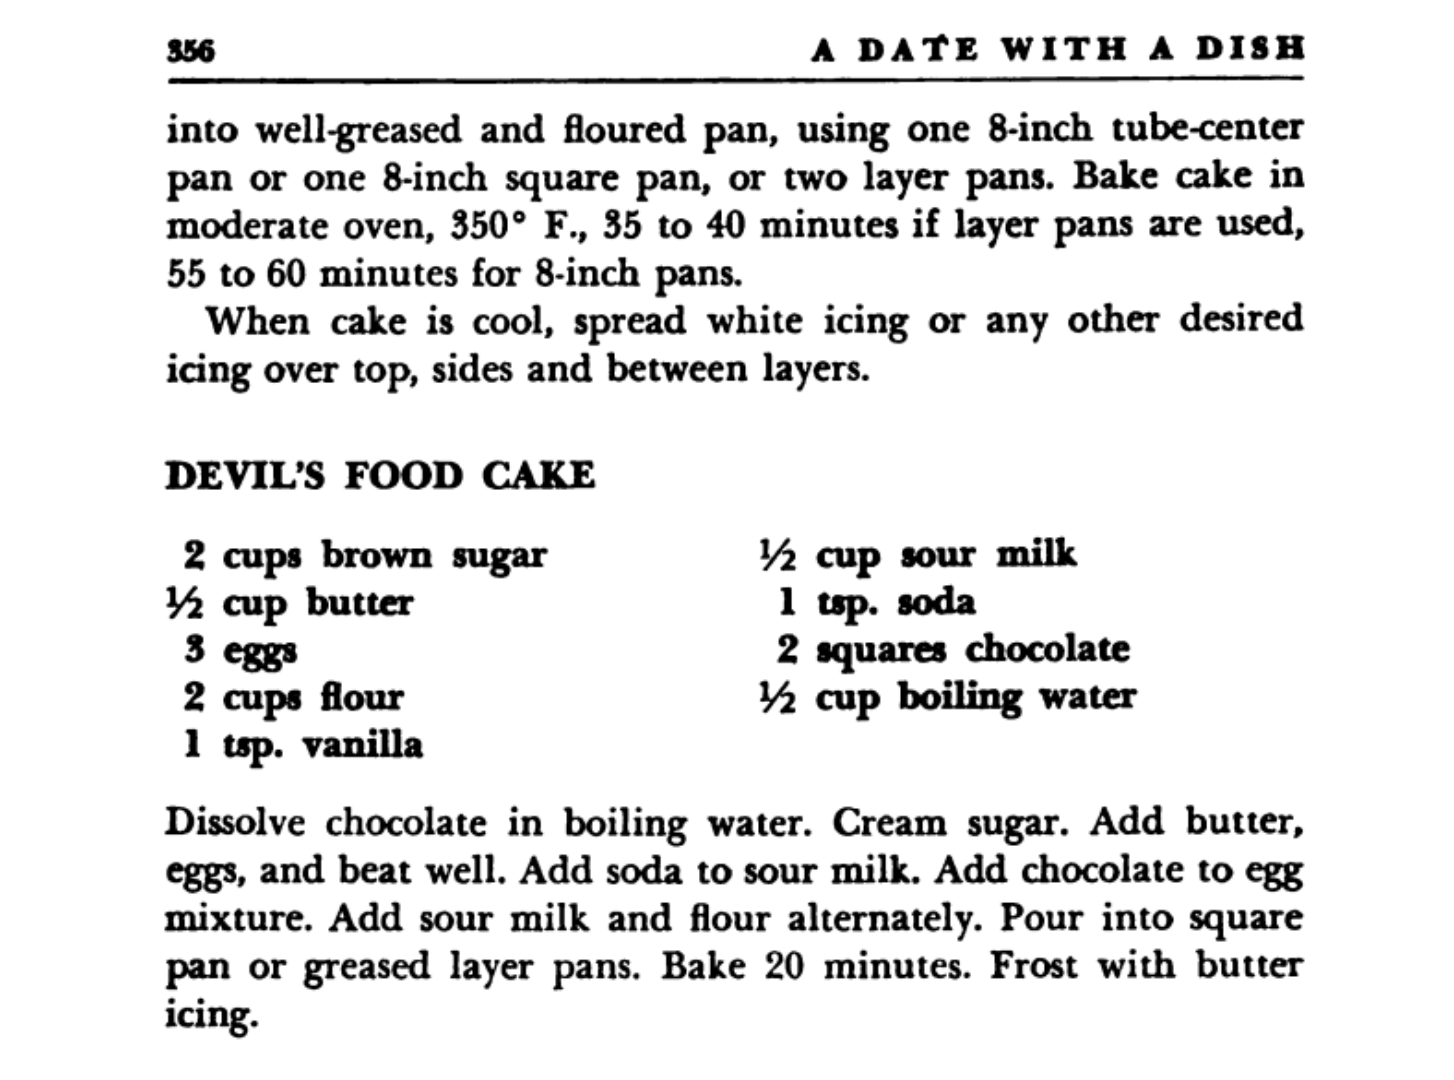
The original recipe from the Tollhouse cookbook is nearly identical to the modern Toll House cookie recipe. The only difference being a single teaspoon of hot water in the original. This was likely to insure the baking soda disperesead evenly throughout the dough.

giphy.gif

However, Sue Bridger's daughter Peg claimed she had the authentic original recipe. This had only two key differences when adjusted for quantity: a slightly lower flour content and the use of shortening instead of butter. 

Now, I feel I have to be honest with you all. While my mom swears by these cookies, I find this recipe just ‘meh.’ So while I put this recipe here for you to try, please, go out into the wide world of cookie recipes and find one that suits your tastes. Maybe it is this one, but more than likely I think it will be one of the 100’s of variations on this recipe that has arisen since.


Original Nestlé Toll House Chocolate Chip Cookies (from Toll House Tried and True Recipes)

1 cup butter

¾ cup brown sugar

¾ granulated sugar

2 whole eggs

1 teaspoon soda

1 teaspoon hot water

2 ¼ cup all-purpose flour 

1 teaspoon salt

1 cup chopped nuts

2 economy-size semi-sweet chocolate bars (2 7oz bars)

1 teaspoon vanilla.

Cream butter and add sugar and eggs. Dissolve soda in hot water and mix alternately with flour sifted with salt. Lastly, add the nuts and finely chopped chocolate. Flavor with Vanilla and drop by half teaspoons on a greased cookie sheet. Bake 10 to 12 minutes in a moderately hot oven (375).

Vanilla: The Flavor that Almost Wasn't

Vanilla is a variety of orchid, and as such, is a fickle bitch. There, I said it, orchids are assholes. There is no other explanation as to why a plant would thrive on a particular kind of neglect that actually requires a lot of effort. Vanilla orchids, in particular, are the mysterious lovely plant that gives us the vanilla bean. That sweet, wonderful smell simultaneously takes us to a tropical island and our grandmothers’ kitchens. This delightful flavoring is in almost every baking recipe. 

But it almost wasn’t.

Vanilla, much like its tasty counterpart chocolate, comes to us from the Aztecs. In 1519 the Spanish conquest brought both back to Europe to the delight of the white rich and powerful. Live plants were brought back in the hopes of cultivating vanilla beans for the larger European market. Sadly, none of the flowers ever produced a vanilla bean. But the Europeans kept trying their gosh darn hardest. 

Literally, hundreds of years passed. In 1836 Belgian horticulturist Charles Morren proposed that vanilla wouldn’t grow as it lacked its natural pollinator, the Melipona bee, which does not live in Europe. As it turns out, the Melipona is probably not the natural pollinator, and there is still debate on what is. But he was correct in his summation that the flowers weren't being pollinated. And in 1839, he wrote to hand fertilize the vanilla orchid, "It is thus necessary to raise the velamen or cut it when the plant is to be fecundated and to place in direct contact the pollen and the stigmatic surface."

Problem solved, right? Wrong. With no other context given, no one had any idea what he was talking about. 

Being the capitalist-driven idiots that rich white Europeans were, they decided, “Hey, you know what would be a good idea? Growing a fuck-ton of that plant, no one has ever successfully pollinated and sell the beans no one has ever grown. But it’s cool, we will just grow them in a climate similar to Mexico’s, and it will be fine.” And thus, French colonists of the 1820s planted a host of vanilla orchids on Madagascar's islands in the hopes of creating a vanilla empire. 

It was not fine. 

Edmond Albius crica 1863 with vanilla orchid growing up a tree.

Edmond Albius crica 1863 with vanilla orchid growing up a tree.

Enter Edmond Albius. In 1841 Albius was a 12-year-old slave owned by Ferreol Bellier-Bauemont. Bellier-Beaumont had a vanilla bean plantation on the island of Réunion for 22 years. And in that time, do you know how many beans he had? Zero. That's right. The plants that never fruited continued to never fruit. Shocking, I know.

That is until one morning in 1841, Bellier-Beaumont was walking with Edmond when they came across the last surviving vanilla plant; only two discover not one but two vanilla beans! Bellier-Beaumont was shook. But not as shook as he was when Albius told him that he, a 12-year-old African slave, had succeeded where hundreds of years of white men had failed. 

Edmond had previously learned how to hand pollinate watermelons by “marrying the male and female parts together.” After learning this basis of horticultural production, Albius spent the next few months studying the orchid until he was able to identify the two parts of the orchid that must touch for pollination to happen. 

Bellier-Beaumont, still somewhat skeptical of Edmond, asked him to do it again. Albius did. And the flowers that he hand-pollinated continued to produce. Bellier-Beaumont sent Edmond from plantation to plantation, having him teach the technique to all the other slaves. 

And thus, a failing industry of white men was saved by the brilliance of a 12-year-old black slave.

You would think that due to the service he provided and the multi-billion-dollar industry he single-handedly created; Edmond Albius was rewarded. But sadly, this is not the case.

Bellier-Beaumont gave Albius his freedom and wrote to the governor asking that Albius be paid “for his role in making the vanilla industry.” But nothing came of it. 

Left destitute, Edmond turned to a life of crime to support himself and was eventually sentenced to five years in jail. Once again, Bellier-Beaumont wrote to the governor stating:

I appeal to your compassion in the case of a young black boy condemned to hard labor … If anyone has a right to clemency and to recognition for his achievements, then it is Edmond … It is entirely due to him that this country owes [sic] a new branch of industry—for it is he who first discovered how to manually fertilize the vanilla plant.

This time the governor responded and had Albius released. But still without any hope of financial compensation. 

Then French botanist Jean Michel Claud Richard, claimed that he had invented the method to pollinate vanilla orchids. He claimed to have traveled to Réunion in 1838 to teach the technique, and somehow Edmond must have seen him perform the technique.  

Bellier-Beaumont denied these claims and defended his former slave, pointing out all the inaccuracies in Richard's story, including the fact that there were literally no vanilla beans grown in captivity before Edmond, and no one remembered Richard being on the island or teaching the technique:

I have been [Richard’s] friend for many years, and regret anything which causes him pain, but I also have my obligations to Edmond. Through old age, faulty memory, or some other cause, M. Richard now imagines that he himself discovered the secret of how to pollinate vanilla, and imagines that he taught the technique to the person who discovered it! Let us leave him to his fantasies.

Despite some effort from Bellier-Beaumount, and his truly remarkable innovation, Edmond lived a poor difficult life and died in 1880 at age 51. His obituary in the Moniteur reads, “The very man who at great profit to his colony, discovered how to pollinate vanilla flowers has died in the hospital at Sainte-Suzanne. It was a destitute and miserable end” (August 26th, 1880).

Recipe

Homemade Vanilla Extract:

Homemade vanilla extract is straightforward to make. All it takes is plain-tasting alcohol, vanilla beans, a sealed jar, and time. Vodka is the typical choice for vanilla. Despite the name "bourbon vanilla," bourbon does not refer to the alcohol-infused, but refers to the Isle of Bourbon, the former name of the Réunion, where the vanilla industry was born. That being said, don’t feel constrained with using vodka. You are the master of your own destiny. You want to use bourbon in your extract, use bourbon! You want rum? Great! Brandy, why the fuck not? Do whatever makes you happy.

Supplies:

1 8oz sealed jar *

4-6 vanilla beans**

1 cup alcohol

1 funnel, recommended

Instructions: 

  1. Cut vanilla beans in half and split open.

  2. Place at least 4 whole beans (8 halves, or up to 12 halves) into the container. 

  3. If using, place your funnel in the mouth of the container. Fill the jar with 8oz alcohol of choice.

  4. Seal your jar and place it in a dark place to rest. 

  5. Forget about it. Forget about it for at least 8 weeks. Maybe shake it once in a while. It is okay to leave it longer. Real pure vanilla extract literally never goes bad. And unlike spices, the longer it sits, the more potent it gets. Found an old bottle from 7 years ago in the back of your pantry (not that I’ve done that…)? Go ahead and use it! Make a bunch of these and let them sit for 10 months until the holidays. Your family will love you. 

*I used a repurposed whiskey flask

** Yes, it is a lot of beans. Get thee to a Costco! 

Witch’s Brew

Why Witches Look the Way They Do

Fall is here, which means it’s time for all things creepy, kooky, mysterious, and spooky!

source.gif

I have always loved this time of year. As a kid, it was the best because you got to dress up in costumes and eat way too much candy. As an adult, it remains the best because you get to dress up in costumes, eat way too much candy, AND drink fantastic beer!* 

tenor.gif

It is a truly magical time. 

With that in mind, we are going to talk about the secret history of witches and beer. 

This post has to do with witch imagery in Anglo culture, starting in about the 15th century, the modern representations of witches in that culture, and their intrinsic tie to medieval beer brewing.  Other parts of the world also have fascinating histories of powerful, mystical women that you can read about herehere, and here (among other places.) 

Now, then… 

In medieval England, beer brewing was initially done in the house and was seen as one of many domestic tasks for which women were solely responsible. During the late medieval evil period, women began to share the brewing, making large batches of ale and selling it.  

Then in the tail end of the 14th century, following the first round of The Black Death, the world began to change. Grain became cheaper, people began living closer together in urban settings, quality of life increased. With these changes came an increase in beer brewing ability and the rise of the alehouse. And the people of medieval England sure did drink. Some estimates are up to a gallon of ale per person per day.  

While, yeah, that is a lot, it isn’t quite as bad as it sounds. There were practical reasons why medieval Brits drank so much ale. 

Beer also provided many vital nutrients, including carbs, to help keep people working throughout the day. At the time beer was also less alcoholic than today’s brews, coming in at closer to 3% alcohol. While this meant you didn’t get as much of a buzz and it didn’t last as long, The fermentation process also killed bacteria that lived in the water. Not a bad thing when you are working your way in and out of plague outbreaks…

While there were male brewers, the profession particularly appealed to women. Brewing and selling beer (a trade known as tippling or tapping) allowed women to work in a well-paid profession. Medieval England had a lot of restrictions on what professional work women were and were not allowed to do. Brewing provided many with enough income that they could support themselves. By 1400 the women who worked in these professions began to be known as Alewives. 


Ale Wife

Ale Wife

Witch costume from Amazon.com

Witch costume from Amazon.com

You may notice some similarities between the above picture and our imagery of witches.  

Hats: Alewives and tipplers wore tall hats, sometimes pointed, sometimes flat. The reason was simple: marketing. It marked alewives for their profession and made it easier to find the barkeep and order the next pint of ale. This style of hat also went on to become incredibly popular. Hennin hats were wildly trendy by the 14th and 15th centuries, and in the 16th and 17th capotain and Phrygian hats became popular. Both look remarkably similar to those depicted on witches. In fairness, there were a lot of tall hats being worn at the time.

“Witches hat”

“Witches hat”

Cats: This one is pretty simple. Cats eat mice. Mice eat grain. You can’t make beer without grain. It was not uncommon for brewers to keep cats around to keep the mice at bay and protect their grain. Over the centuries, many pets have been linked to accused witches as “familiars” but the cat remains the most popular image. 

682f04a4c3ddd483799b0deabf2b8ca7513fd36b_00.gif

Caldrons: To make a batch of beer, you have to make a large pot of wort. In the 15th century and until reasonably recently, large pots of anything were made in heavy cauldrons set over a fire. 

Brooms: To signal a batch of ale was complete, alewives would hang an alestake or ale pole out the window. Depending on what source you look at, the alestake was either a typical broom to symbolize domestic work or a branch with a bush or garland attached to the end. Either way, it doesn't take a lot of imagination to understand how that simply became a “broom” after hundreds of years.

Ale pole signaling ale is ready

Ale pole signaling ale is ready

Alewives had a pretty good deal, especially for being women in a horribly patriarchal society with limited knowledge of personal hygiene. But then, greedy men had to come and ruin it. The powerful men were unhappy that these women had found a way to make a life and name for themselves outside of their society's strict confines

The Church was unhappy that women began to hold jobs—jobs that provided alcohol. Depictions of alewives started to take on sinister imagery with horns and nakedness. Between the Church and government, rumors spread of alewives as thieves and tricksters, swindling men out of their money, deceiving their clients. At the same time, male only brewing guilds were formed. Men began opening taverns of their own. Despite being men being just as deceptive in business as women, only women got a bad reputation.   

As time went on, many alewives were accused of witchcraft and persecuted. Unfortunately, there was a grain (pun intended) of truth to this that allowed the hysteria to take hold. A fungus called Ergot was common on barley grain. It was so common that it was assumed the black kernels that replaced portions of the grain were just part of the plant. However, Ergot is hallucinogenic, similar to LSD. But as Sarah Loman put, it "only gives you a bad trip." This could account for the idea of flying specters and men claiming to have been “enchanted” by women.  

Ergot infested rye

Ergot infested rye

Women continued to brew beer despite being literally murdered for it. (But what weren’t they going to be murdered for? Honestly.) Still, by the 1600s, men had become the primary brewers, and the image that once represented an alewife became synonymous with evil witches.

There is still debate among historians on whether witches' eventual imagery is the direct result of the Church's smear campaign on alewives, or nearly coincidence. To me, the evidence is overwhelming. And one thing is sure, the modern-day witch certainly does look like the strong brewing witches of old. 

Happy haunting, everybody!

tenor-1.gif


Recipe 

1 bottle of beer

Chilled drinking glass or mug

Instructions:

1.     Pour beer into a chilled glass or mug

2.     Drink

Follow me on Instagram and Facebook for more great recipes like this one. 


*In fairness, I don’t really like beer but I love October, and I’ve been assured that there is a lot of good beer to be had during Octoberfest…or at least that after long enough no one cares. 

Poire Belle Hélène Ice Cream

Riesling Poached Pear and Chocolate Ice Cream

I am easily lured in by things with my name in it. I think it comes from having a relatively uncommon name, and an even less common pronunciation of that name (it is hah-LAY-nah BTW). I was DEVASTATED when goth Helena was kicked off Season 10 of The Great British Bake Off. As an all-things-creepy-loving Helena myself, there was a kinship there she will never know…

All this to say, when my mother-in-law gifted me four pears that needed to be eaten, I researched and found a dessert—a Poire Belle Helene—and knew I had to make it. 

Poire Belle Helene is a simple and easy to prepare dessert of poached pears dipped in chocolate sauce and served with ice cream. The dessert was created by Auguste Escoffier (yes, THAT Escoffier) and named after La belle Hélène, an opera by Offenbach, which premiered in 1864. The opera is a parody of the love story between Paris and Helen, set during the Trojan War. Apparently nothing says ancient Greece like… pears, ice cream, and chocolate?

Perhaps it has more to do with the beautiful, elegant melding of flavors. The chocolate, pears, and cream blend together to create a creamy, sweet bite full of rich flavor and texture. Similarly, Helen of Troy was known for her beauty; she was the ‘face that launched 1000 ships.’ (A line written by Shakespeare’s arch nemesis Christopher Marlowe in a play about necromancy. )

Helene_Paris_David.jpg

The Love of Helen and Paris by Jacques-Louis David (oil on canvas, 1788, Louvre, Paris)

To make the basic Belle Helene, all you need are pears, sugar, cream, and chocolate. It can be made ahead of time and stored in the fridge until serving. This makes it an ideal dessert for restaurants and fancy dinner parties to impress your friends. You know…whenever we can have dinner parties again.

I could not find the original recipe that Escoffier created for the dessert, which gave me a lot of freedom to tailor it to my exact tastes. In addition to using Riesling, I added some warm spices to round out the flavor. To simplify the dish, I opted to cut out the middleman and turn the whole thing into ice cream. We all know I would have made my own ice cream anyway, so yes, this was how I simplified things.  


Bon appétit!

Yummy fudge ripples and chunks of pear.

Yummy fudge ripples and chunks of pear.


Poire Belle Helene (Riesling Poached Pear and Chocolate) Ice Cream

This is a versatile recipe. Simplify it completely by removing the spices or add in your favorite flavor. 

Ingredients:

3-4 pears

2 cups Riesling*

¾ cup sugar

1 teaspoon ground cardamom

1 cinnamon stick

1 vanilla pod, scraped

1 tablespoon freshly grated ginger

2 cups cream

1 cup milk


Ganache:

½ cup cream

½ cup chocolate chips


1.     Prep your ice cream maker however their directions require (turn on the cooler, freeze the base, whatever you have to do).

2.     Dice your pears into small pieces. They don’t have to be perfectly chopped as you will be puréeing half of them.

3.     Place the diced pears in the high rimmed pan and fill with enough Riesling to cover the pears. About 2 cups of Riesling should work. Add the sugar, cardamom, vanilla, cinnamon, and ginger to the pan and bring the liquid to a boil. Lower the temperature and allow to a simmer for 10 minutes.

4.     Strain the pears into a bowl, reserving the liquid, and set pears aside. Return the liquid to the pan and boil uncovered until reduced by half. Allow to cool for a bit. 

5.     Pour the reduced liquid and half of the pears into a blender and blend until a smooth purée has been formed.

6.     In a large bowl, mix 2 cups cream, 1 cup milk, and the contents of the blender. Whisk together until fully emulsified.

7.     Pour the mixture into the prepped ice cream maker, following the manufacturer’s instructions to churn.

8.     While the ice cream is churning, make the ganache. Put the chocolate chips and heavy cream into a microwave-safe bowl. Warm for 30 seconds, then stir. Continue warming in 10-second increments until chips are melted and can be incorporated with the cream using a small whisk. Set aside.

9.     When the ice cream is nearly finished churning, add the remaining cooked pears and allow to churn a few times to mix in.

10.  Remove ice cream from the maker. When separating into containers for saving, dollop your chocolate ganache into the ice cream and mix 1-2 times to get nice streaking. Do not over mix, or you will end up with chocolate ice cream, which, while delicious, is not what you are going for. 

11.  Put contents in the freezer to firm up. Enjoy!  

*You can also use half water, half Reisling, or all water. Or water and a splash of rum. Seriously, do whatever you want with this. It’s not finicky. Just make sure you have enough liquid to cover the pears.

10 Steps to Restoring Your 1917 Fireplace

... and the drinks to pair with it.

Step 1: Get Frustrated

All good DIY renovations and repairs start with a good old helping of frustration. Your ceiling is falling, the cabinet door fell off one more time, your son trips over the raw edge of you shitty 1980s fireplace and nearly cracks his skull open on the Dynasty-era oversized marble tiles.

Are there people you could pay to fix this third concern? Sure. But who has that kind of money right now? We are in the middle of a pandemic, my pay has been cut, and my child's safety is at stake, so I decide to test the waters just to see if this is something I can feasibly do. 

I start by placing a flat putty knife in between the hardwood floor (oh yes, they tiled directly onto the hardwood floor) and shimmying it to separate the floor and tile gently. The tile begins to separate and release, but I run into a tough spot. I grab the hammer and tap the putty knife handle. The whole piece of marble, along with what appears to be a glob of Thin-Set mortar, pulls off the floor.

This is a good start. But at this point, the baby was up from his nap, so I can’t continue. I put the tools away and planned to continue after his bedtime.

Step 2: Pour Yourself a Drink

Once the baby goes down for the night, I bring my tools back out, look at the fireplace, and decide I need a drink if I am taking on this whole project. We are now what feels like an infinite number of days into quarantine, and I’ve been mixing cocktails nightly, but now I want something a little more project-appropriate. A quick Google search for classic cocktails turns up Harry MacElhone of Harry's New York Bar in Paris and his 1927 book Barflies and Cocktails  Perfect! I find a drink, pour it, and continue on my way.

Recipe from the Barflies and Cocktails. Image from the 1927 version.

Recipe from the Barflies and Cocktails. Image from the 1927 version.

Monkey Gland

A delicious cocktail I highly recommend. It is incredibly worth it to use homemade grenadine.

1 dash Absinthe,

1 teaspoon grenadine

1/2 oz orange juice

1/2 oz Gin

Absinth rinse a cocktail glass. Shake all other ingredients, and strain into glass. Enjoy.


Step 3: Smash Some Shit

I begin hammering off the tiles using the spatula and hammer method. The small tiles are coming off quickly, but the big tiles are resistant. I need more leverage. Despite my best efforts, going the gentle route just isn't working. While acknowledging that I am risking damage to the very thing I am trying to save, I grab a flat head screwdriver and hammer to get a more centralized force behind each blow. I smash that shit apart. It is amazingly effective for quick removal.

Recipe from ‘Harry’ of Ciro’s A B C of Mixing Cocktails by Harry MacElhone (1923)

Recipe from ‘Harry’ of Ciro’s A B C of Mixing Cocktails by Harry MacElhone (1923)

Absinthe Cocktail

Literally the first recipe in the book, because when you are busy smashing shit, you don’t have time to carefully scour a book…also my husband loves absinthe. Adapted for modern cocktail measurements.

Absinth Cocktail

1 oz Absinthe

1/2 oz gin

1/2 oz simple syrup

2 dashes orange bitters

2 dashes angostura bitters

Combine all ingredients in a cocktail shaker, and shake until cold.


Step 4: Get Frustrated… Again

Equally amazing as the quick results is that this hammer and flathead method causes very little long-term damage to the hearth underneath. There is just the matter of cleaning the tile.

After smashing is complete there is still a significant portion of leftover thin-set on the tile beneath, as well as not one but TWO different kinds of carpet glue on the tiles. I am going to start with the glue even though you can see from the pictures I did the thin-set first; if I were to do it again, I would start with glue for ease of removal.

Carpet glue from the 1950s (pre-retiling) in the back, and 1980s (post-retiling) in the front.

Carpet glue from the 1950s (pre-retiling) in the back, and 1980s (post-retiling) in the front.

After trying multiple methods, including a heat gun, dry chissle, and light sanding, it is Goo-Gone that finally does the trick. I let the product sit for about 20 minutes and then use the small putty knife to scrape off the glue. It takes a little elbow grease, but it works, much better than I ever expected.

Pro-Tip: If you do use this method, just be sure to wash all the Goo-Gone off afterward, or the acid will keep eating away at what it touches.

Now I am frustrated...again. This hearth is beautiful. The colors match my Arts and Crafts style house, and there is no raw edge for the baby to slip on. Why the fuck did anyone put such inappropriate tile over it in the first place? Is it possible for me to save the rest of the fireplace? And how do I now get the remnants of the Thin-Set off the hearth without destroying the finish?

I think I might need to mix another drink, but I am growing a bit tired of Harry’s cocktails and want to mix it up. So back to the internet I go.


Step 5: More Research

Now for the Thin-Set. According to some Googling, vinegar reacts with thin-set and will eat away at it. Vinegar also won’t destroy glazed tile, but it should not be used on natural stone (such as marble) as it will start to dissolve it. However, I don’t care about damage to the marble tile, and they are breaking as they come off anyway.

I put some vinegar in a spray bottle, spray down the hearth, and voilà, the thin-set audibly starts to fizz, and I can scrape it off without scratching the tiles. This gives me hope for the rest of the fireplace.

Tom Bullock and his book, Ideal Bartender

Tom Bullock and his book, Ideal Bartender

In my search for a new drink, I come across a 1917 cocktail book written by Tom Bullock, a once-famous bartender born in 1873 Kentucky.

In his time, he was an incredibly well-known and revered mixologist. He found fame when he worked at the St. Louis Country Club. His cocktails—especially his juleps—were admired all around the country. While mint juleps are the most common, I am all out of mint, so I opt for Bullock’s Overall Julep—St. Louis Style. It is sublime.

A delicious, if intoxicating Julep. Perfect for hot nights of fireplace restoration. Just make sure you don’t drink it too quickly

A delicious, if intoxicating Julep. Perfect for hot nights of fireplace restoration. Just make sure you don’t drink it too quickly

Overall Julep

A “Wineglass” used to be a standard unit of measurement of 2 oz. I have adapted the recipe for current standard cocktail mesurments.

Photo taken by my husband, who at this point has become the official cocktail scribe. (Bonus preview of the work to come!)

Photo taken by my husband, who at this point has become the official cocktail scribe. (Bonus preview of the work to come!)

1.5 oz Rye Whiskey

1.5 oz Gin

1 oz grenadine

1/2 or 1/2 oz lemon juice

1/2 or 1/2 oz lime juice

Club soda

Combine all ingredients in a cocktail shaker and shake until chilled. Pour into a Collins glass filled with ice and top with club soda.


Step 6: Plan the Attack

Only being able to work when the baby is in bed, we are nearly a week into this already. I have my hammer, my flat-head screwdriver, and a spray bottle of vinegar. I want to start in the place with the least resistance so I can get a foothold. I inspect the inside of the fireplace and notice the original tiles on top curve down, whereas the marble ones go straight. This creates a pocket of space to start prying away at this awful façade. I spray underneath with vinegar and let it sit, and then begin to hammer.

I have miscalculated.

While I manage to remove the first large tile, I have broken the corner off one of the tiles. Nothing was supporting the bottom portion of the curved tiles, and even though these original tiles are thick and strong in a way that thin marble just can't be, it has cracked. I remove the marble tile and the broken original piece. I save the piece to reattach later, but from then on make sure I am not starting in the weak spots.

While I am sad about the tile, the drink was delicious and softened the blow. I wonder why I had never heard of Tom Bullock before. He was clearly important enough to have written a cocktail book in 1917, and he served presidents. How could he have been forgotten by time?

The answer is obvious. You knew the answer as well as I did the moment you saw his picture. America forgot Bullock because he was black.

Being a black bartender in the US during the early 1900s was a complicated profession. Bars in the south were differently segregated than those in the north. In the north black bartenders served at black patronized bars, and white bartenders served at white bars. Yet, in the south, black bartenders were almost revered for their skills and frequently served in white-only bars. Their status in southern bars has been described as "privileged.” It cannot be overstated that while black bartenders certainly held a higher position than other black people in the south, they were still kept solely in service positions and were never treated as equals. It did, however, give them an interesting societal view. For example, one of Bullock's biggest fans was George Herbert Walker, grandfather, and great-grandfather to the Bush presidents. Walker even wrote the introduction to Bullock's book, stating, "I doubt he has erred in even one of his concoctions."


Step 7: Break Out in Hives

I continue to scrape and chizzle away at the marble tiles that cover the original Arts and Crafts tiles. Some are harder than others to remove. It appears the people who did this travesty of a reno didn’t really know what they were doing. For example, not all of the tiles were applied with grooved Thin-Set; some had it just slathered on. Additionally, when tiling over tile, you are supposed to scuff the original tile so the Thin-Set will adhere. They did not do this. I am the beneficiary of their shoddy work, as it makes the marble lift off more easily and preserves most of the original tile. There are some dings. The force I have to use ends up scraping a few of the original tiles. The glaze has chipped away in a few spots, but I will take a few imperfections over the awful white marble that covered it any day.

At this time, I also start to break out in hives all over my body. I am not sure initially what causes them, but it becomes apparent over time that there is something in the dust of this project to which my body is reacting. Every night when I would go take a hot shower after the demo, my pores would open and let more stuff in. I am now popping Benadryl each night to try and keep the itching down so I can sleep.

Who knows what shit is in this 1980s-era thin-set; this country isn't always great on safety regulations. For example, did you know asbestos isn’t technically nationally banned in the US? We managed to ban the sale of alcohol for years, destroying people's businesses and livelihoods, but can’t manage safety regulations for building materials in a timely fashion.

In fact, prohibition hit just three years after the publication of Bullock’s book. Between being a literal second-class citizen who was not allowed to sit at the bar where he served, and now an utter lack of alcohol, Bullock's legacy and book were all but forgotten by white America. It was the first and last book published by an African-American author for 100 years.

Step 8: A Labor of Love

The fireplace takes longer than I thought. While I planned this to be a two or three-week reno, things have gotten in the way, and the chizzling took longer than expected, so we are now working on weeks 3 or 4. I have lost count. It is truly a labor of love.  

Nearly a century after it was first published, Cocktail Kingdom republished Bullock’s Ideal Bartender. It took the publishers ten years just to find a copy to republish. Meanwhile, other cocktail books of the time, such as Harry McElhone’s books have continued to be easy to find both digitally and in print publications.

Pequot Semer

Another classic from Bullock to help me muddle through the endless chipping and cleaning. Measurements, once again, adapted for modern bartending.

Bonus preview of the finished fireplace.

Bonus preview of the finished fireplace.

1/2 oz pineapple juice

1/2 oz orange juice

2 oz gin

Juice of 1 lime

1 dash grenadine

Sprig fresh mint

Seltzer water for finishing

Muddle ingredients in Collins glass, will with ice, and top with seltzer.


Step 9: Acceptance and Defiance.

I accept that the previous renovators had their reasons for defacing this fireplace. They wanted modern and sleek but didn't want to pay for it. So they bought cheap, thin marble, employed the fastest methods to put it up, and didn't care to make sure their work was done correctly. I can accept this, understand it, and still, it is not an excuse for doing such a shit job.  In fact, tiles that I think should pop off easily don’t, and others just randomly fall to the ground with the slightest touch, just missing my feet. (These were nearly 10” x 10” marble tiles, some apparently barely hanging onto the original ones below, and most heavy with sharp edges.) 


Step 10: The Final Touches

The demo is done, and now all that is left is some final touches and clean up. This, of course, takes way longer than it should have. I am still left with the few pieces of tile that broke and even a small sliver that remained glued to the dreadful marble.  I start by soaking that piece of marble that has the chip of tile in it. It is the only tile that chipped, and I am determined not to lose this small piece. I spend three hours with a set of dental tools purchased from Target, excavating it out. I finally manage to get it. My husband is impressed and also amazed that I was willing to spend so long on just a chip. But, with so much time already spent on this project, it is important to make the effort and return the fireplace to its original beauty.

Two other tiles fell off with the marble during the processes. These need to be cleaned, one glued back together, and then both reattached. Once I finish cleaning the individual pieces, I clean the face and set to work reattaching these pieces. 

Luckily I keep Thin-Set and Krazy Glue on hand at all times. I attach the broken tiles back together, and also reattach the chip, and a cracked corner piece. I lay Thin-Set on the pieces that fell off. The mortar needs twenty-four hours to set, and then I can grout. Keeping the child away from the fireplace during this time was a challenge, but we made it work.

I need only a small amount of off-white grout to match the existing grout. My godmother, who is similarly DIY-inclined, provides me with the material. I then have to clean the tiles four more times to get all the grout haze off. I go through a Costco size tub of vinegar during the whole process, and it could still use a good cleaning, but it is done.


Conclusion

In the 103 years since my fireplace was able to breathe fully, it appears that only two more cocktail books by black authors have come out in America. Tiki: Modern Tropical Cocktails by Shannon Mustipher, released in 2017 (yes, a full 100 years after Bullock’s) and Drink: The Ultimate Cocktail Book by Kurt Maitland, in 2019.

While doing something gently and with care is a worthwhile technique, it is not always effective. Sometimes you need to smash the shit out of it, or just throw the whole thing out and start over. Obviously we still have work to do. We want to get rid of the wall of mirrors, add wood trim to the edges of the fireplace to cover the raw edges, and install built-ins on either side. But progress has been made, and that is something.

Time to pour a drink, and start planning the next project.

Americano, Negroni, Boulevardier... Oh My!

Quaran-tini

Today we are going to look at three classic cocktails, all related by one ingredient: the Americano (the cocktail, not the espresso drink), the Negroni, and the Boulevardier (pronounced like a combination of boulevard and Bouvier). As I have been stuck inside, and apparently will be for the foreseeable future, now seems like a great time to research and sample all three—you know…for science…or history…or something….

Each drink is a mixture of Campari (a bitters-style aperitif made from a secret infusion of herbs and fruits, and characterized by its bright red color), sweet vermouth (a fortified wine-based aperitif flavored with a variety of botanicals), and a third liquid. It is the third liquid that distinguishes one drink from the other. Each cocktail combines their three liquids and stirs over ice. Do not let me catch you shaking them. This will dilute the alcohol faster and lead to a weaker drink. 

But let's not get ahead of ourselves, I will start at the beginning with Gaspare Campari. Campari was the son of a farmer born in Lombardy, Italy. He began working in bars at a young age, so young that by 14, he was mixing drinks at Bass Bar in Castelnuovo. Here, he gained knowledge of people's drinking habits and tastes, an insight he used to start formulating his own liquors. By the 1840s Campari was selling a bitters aperitif called Bitter All’Uso d’Holanda. It sold well, and over the years Campari perfected the formulation into the bright red herby beverage we know today as Campari.

In the 1860 Campari opened his own bar in Milan called Caffè Campari and began offering a variety of cocktails featuring a variety of his liquors.

The Americano

Campari Initially began serving a strong drink called the Milano-Torino (or Mi-To), comprised of equal parts Campari (from Milan) and vermouth (from Torin) in his café. The simple addition of soda water and a lemon garnish turned this into the classic Americano we know today. The cocktail became incredibly popular with American tourists in the 20th century who flocked to Europe during Prohibition. This popularity led Campari to rename the cocktail after them.

Despite his preference for a Vesper Martini, the Americano is actually the first cocktail mentioned in a James Bond novel. In Casino Royale, Bond orders an Americano, and in the short story "A View to Kill," Bond is said to order them frequently:

One cannot drink seriously in French cafés. Out of doors on a pavement in the sun is no place for vodka or whisky or gin. A fine à l’eau is fairly serious, but it intoxicates without tasting very good. A quart de champagne or a champagne à l’orange is all right before luncheon, but in the evening one quart leads to another quart and a bottle of indifferent champagne is a bad foundation for the night. Pernod is possible, but it should be drunk in company, and anyway Bond had never liked the stuff because its licorice taste reminded him of his childhood. No, in cafés you have to drink the least offensive of the musical comedy drinks that go with them, and Bond always had the same thing—an Americano—Bitter Campari, Cinzano [vermouth], a large slice of lemon peel and soda.

Despite his frequency of ordering, Bond was none too kind to this “musical comedy drink.” He always “stipulated Perrier, for in his opinion expensive soda water was the cheapest way to improve a poor drink.”

Campari, San Pellegrino, Wigle Whiskey “cocktail Mixer No.1” AKA Wigle’s take on sweet vermouth. (Also pictured, my husband’s MINI.)

Campari, San Pellegrino, Wigle Whiskey “cocktail Mixer No.1” AKA Wigle’s take on sweet vermouth. (Also pictured, my husband’s MINI.)

The Americano Recipe:

1 oz vermouth

1 oz Campari

Club soda

Lemon slice, for garnish

Pour your vermouth and Campari into a highball glass filled with ice, top off with club soda, and garnish with an orange or lemon peel.


Negroni

In food history, tracing the exact invention of a cocktail can be difficult. The Negroni, as a relatively modern invention, is no exception with competing families, both taking credit for its creation. Popular legend goes that the Negroni was concocted in 1919 at Caffe Casoni. A Count by the name of Camillo Negroni asked the bartender, Fosco Scarselli to make him an Americano, but with a twist. Instead of topping it with soda water, he asked that it be mixed with gin, making for a more potent drink. The bartender complied and garnished it with an orange instead of a lemon to distinguish it from the Americano.

Who was Count Negroni? Camilo Luigi Manfredo Maria Negroni was born in 1868 to Count Enrico Girolamo Maria Negroni and Julia Ada Bishop Savage Landor. Both of his parents were in part British, and it is thought he developed a taste for gin during his time in England. In Sulle Tracce Del Conte: la vera storia del cocktail “negroni," Luca Picchi discusses Camilo Negroni's life and the invention of the cocktail. 

Simple enough, except there was another….

Pascal Olivier Count de Negroni was a noted French general born in 1829. His family claims that it was he that invented the Negroni, going so far to discredit other claims as to assert count Camillo Negroni never existed. Although, as Drinkingcup.net states, "I can now reveal with confidence that Count Camillo Negroni did indeed exist. With little more than a 5-minute search via online genealogy platform Ancestry.com, you can view and download a basic family tree, passenger list, and business directory under the name ‘Camillo Negroni’. Moreover, his title as a Count is also recorded.”

Pascal Negroni died in 1913, 6 years before the Negroni is believed to have been invented.

All this drama aside, the Negroni took off and has become an incredibly popular beverage. Its fans include Ernest Hemingway, Anthony Bourdain, and Stanley Tucci. Orson Welles summed up his admiration for the drink this way: “The bitters are excellent for your liver. The gin is bad for you. They balance each other.”

Campari, Wigle Dutch Style Gin, Wigle “Cocktail Mixer No.1” AKA vermouth

Campari, Wigle Dutch Style Gin, Wigle “Cocktail Mixer No.1” AKA vermouth

Recipe

1 oz gin

1 oz sweet vermouth

1 oz Campari

orange peel, for garnish (NOT a lemon)

 Combine all ingredients in a glass over ice, and stir. Garnish with orange peel.


Note: The Negroni is traditionally made with equal parts gin, vermouth, and Campari. However, as Stanly Tucci shows in the link above, you can play with the variations adding more or less of one ingredient. If you aren’t a fan of gin you can sub vodka, turning it into a Negroski, or whiskey turning it into a…


Boulevardier

Typically made with rye or bourbon whiskey, the Boulevardier is the Americanized bastard offspring of the Negroni.  The Boulevardier was invented by Erskine Gwynne, an American expat in France during the 1920s who published a literary magazine of the same name. A member of the Vanderbilt family, Gwynne was a socialite who loved the freedom to drink in France, a luxury not available in the US at the time due to prohibition. 

During prohibition, Americans found themselves suddenly without the comforts of their local bars. Left with illegally drinking in the US, or moving abroad, many Americans headed overseas to get their fix. Tod Sloan went so far as to move an entire mahogany bar piece by piece to Paris and hired Scottish bartender Harry MacElhone to run the place. Eventually, Harry took over the bar and renamed it Harry’s New York Bar. The bar served primarily American expects and tourists desperate for a drink. It is here that Harry and Erskine met, and made history with the Boulevardier. The drink became so popular that Harry included it in his 1927 bar guide “Barflies and Cocktails,” giving full credit for the creation to Erskine Gwynne. 

Campari, Wigle Bourbon, Wigle “Cocktail Mixer Np.1” AKA Vermouth. Yes, Wigle Whiskey products make up a large portion of my liquor cabinet.

Campari, Wigle Bourbon, Wigle “Cocktail Mixer Np.1” AKA Vermouth. Yes, Wigle Whiskey products make up a large portion of my liquor cabinet.

The Recipe of Erskine Gwynne

1oz Bourbon whiskey*

1oz Italian (sweet) vermouth

1oz Campari

Orange or cherry for garnish

Combine bourbon, vermouth, and Campari in mixing glass filled with ice. Stir to chill, and strain into a glass of your choosing. Garnish with orange or cherry. I like to use cherry to help distinguish it from a negroni.


*Rye whiskey has also become an acceptable alternate choice for this drink


Conclusion

Having now spent more than our fair share of time trying different combinations of Campari beverages, my husband and I have concluded we would rather drink Nyquil spritzers than have Campari ever again. Sorry Stanly Tucci.

Snickerdoodles: What's in a Name?

Snicker-Snack!

Stress baking during times of crisis is one of my coping mechanisms. When the going gets tough, I ignore the going in favor of perfecting difficult pastry making.

However… With three kids at home, sometimes you just need a tried and true standby.  For me, that is the Snickerdoodle.

Snickerdoodles are the perfect children’s treat; a tender cookie with a slight tang, covered in cinnamon sugar and baring a very silly name.

There is speculation as to the origin of the word “snickerdoodle,” which appears to be a complete nonsense word in English. 1931s Joy of Cooking claims the term snickerdoodle is based off the German word Schneckennudel—a German pastry whose name literally translates as ‘snail noodle’. A Schneckennudel is a yeast dough roll that more closely resembles a cinnamon bun, not a snickerdoodle cookie.

The Oxford English Dictionary Describes the etymology as “uncertain." They suggest it is perhaps a combination of the words snicker, a smothered laugh, and doodle, a silly or foolish fellow. (Side note: If you have time and access to the Online OED, listening to the British and American pronunciations of snickerdoodle, alternatingly, is deeply entertaining.)

OED Snickerdoodle citation

However, the name origins become much clearer when you discover the snickerdoodle cookie wasn't originally a cookie at all. The treat started as a German coffee cake called a snipdoodle. The snipdoodle received its name from the Pennsylvania Dutch and other early German immigrants. While the term snipdoodle appears to have been used for any sort of coffee cake initially, including those featuring fruits.

By the early 20th century, it had developed to refer to cakes baked in wide pans and cut into quick and easy bars, topped with cinnamon sugar.  

These cake bars seem to have been made specifically to be quick to make, serve, and eat. Being baked in a large pan made them easy to cut and serve, but also would have led to them drying out if not eaten quickly. Stella Parks of Bravetart believes that it is this quick process that led to the development of the name. Using a Pennsylvania Dutch dictionary, Bravetart discovered that “snip coincides with shnit, “to Slice,” or shnipla, “to snip,” and “a few possible origins for the word doodle as well: hoodle and doomel. Both translate as hurry.” Both Bravetart and my husband commented on how this gave them new insight into Lewis Carrol’s “The Jabberwocky“: The vorpal blade went snicker-snack!”

 The first recorded recipe of a “snickerdoodle” isn’t the cookie as we think of it but was the cake sprinkled with cinnamon and sugar and cut into bars. The recipe appeared in the 1889  Home-Maker.

1989 Homemaker Snickerdoodle Recipe

1989 Homemaker Snickerdoodle Recipe

IMG_1243.JPG

They is absolutely delicious and, indeed, quick and easy to make. It was a massive hit with the family.

The next significant evolution for the snickerdoodle came in 1891 when Cornelia Campbell Bradford was commissioned by the Cleveland Baking Company to come up with a recipe using their baking powder. She developed her recipe for “Snickerdoodles” that replaced baking soda and cream of tartar with baking powder. This mellowed the flavor, making it less tangy and allowed the cinnamon to show more prominently. While many people loved this new mellow flavor, the original baking soda and cream of tartar were still used in recipes going forward.

Quickly after that, in 1895, the snickerdoodle we know and love appeared AA Cookbook. The recipe returned to the baking soda and cream of tartar recipe but was now made as a drop cookie. As a cookie, the sweet would last a little bit longer and was still quick and easy to eat.

1895 AA Cookbook

1895 AA Cookbook

In the early 20th century, both snickerdoodle and snipdoodle recipes were easily found. Snipdoodles had come to define the cake pan version of the treat and snickerdoodle the cookie. The next and final introduction to the cookie we see today was added in 1923: shortening. As part of an ad campaign, Crisco created an all shortening recipe for the snickerdoodle cookie. With America slipping into the great depression and then into WWII, butter became scarcer, and Americans flocked to the dairy-free snickerdoodle.

 As Anne Byrn points out in her book American Cookie, the inclusion of shortening is what gives snickerdoodles a gentle rise. Shortening has a higher melt point and traps more air than butter, which leads to a more mounded cookie with a softer middle. Butter, however, lends itself to a lovely buttery flavor. As Byrn points out, a mix of the two is the ideal combination of buttery flavor and shortening texture. And by the 1960s, a combination of the two had become standard, first appearing in the holy bible of cookie books, Betty Crocker’s Cooky Book.

Currently, the recipe is available on the Betty Crocker website.

IMG_1358.JPG

Despite being relatively modern cookies, snickerdoodles, perhaps ironically, remain in popular favor with the Mennonite and Amish community. These cookies remain a popular cookie in the United States but have not caught on as much elsewhere. For Americans, though they remain a love for children and children at heart, such as poet James Whitcomb Riley (whose poems inspired such things as Little Orphan Annie and influenced Raggedy Ann), he declared them his favorite cookie.

Re-creations

For the re-creation, I made the traditional snickerdoodle bar cookie using the 1889 Home Maker recipe, and then, just to spice things up I included my Rumdoodle recipe which is a boozy take on the traditional cookie. It is definitely worth trying both recipes and seeing which one you prefer. Both cookies and cake freeze well, so don’t worry about having too many.

IMG_1244.JPG
IMG_1349.JPG
IMG_1382.JPG

Snickerdoodle Coffee Cake Bar Recipe

Adapted for a modern kitchen from 1889 Home Maker Snickerdoodle recipe

Ingredients:

2 eggs

½ cup butter

2 cups of sugar

1 cup milk

1 teaspoon baking soda

3 cups flour

2 teaspoons cream of tartar

½ teaspoon salt

3 tablespoons cinnamon-sugar mixture

 Directions:

1.     Preheat over to 350 degrees. Line or grease and flour a full sheet pan.

2.     Cream together butter and sugar. Add in the eggs one at a time and beat until light and fluffy.

3.     Dissolve the baking soda in the milk. Then add to the sugar-butter mixture.

4.     Add flour, cream of tartar, and salt.

5.     Spread thin over prepared sheet pan. Using a rubber spatula to spread to all corners. Sprinkle the cinnamon-sugar mixture on top of the batter.

6.     Bake at 350 for 22-25min.

7.     Slice and eat.


My Snickerdoodle Recipe

I love the Betty Crocker recipe, but I don't love shortening. When I do mine dairy-free, I use a butter substitute, such as Earth Balance, not a shortening. However, I love that soft pillow top the shortening gives to the cookie. My take on the snickerdoodle adds a little spiced rum to the mix. Not only does this add an additional spice note to the cookie, but the alcohol and added liquid also react with the baking soda to add a level of tenderness and puff that would have otherwise been lost.

Rumdoodle Cookies (Snickerdoodle variant)

Ingredients:

1 ½ cups sugar

1 cup butter, or butter substitute

2 eggs

2 tablespoons spiced rum

2 ¾ cups flour

2 teaspoons cream of tartar

1 teaspoon baking soda

¼ teaspoon salt

3 tablespoons cinnamon sugar*

Directions:

1.     Preheat oven to 400 degrees and line two baking sheets with parchment paper.

2.     In a large bowl, cream sugar and butter together until light and fluffy. Add in eggs and rum. Mix until incorporated.

3.     Add your flour, cream of tartar, baking soda, and salt. Mix until incorporated

4.     Using your hands or a scooper, portion out 1-1.5 inch round balls of dough. Roll in the cinnamon-sugar mixture and place on the baking sheet giving plenty of space for cookies to spread.

5.     Bake for 10-12 minutes.

*Typical cinnamon sugar is 2 parts sugar, 1 part cinnamon. For example, 1 tablespoon sugar, 1 teaspoon cinnamon. I personally like a spicier, less sweet coating and do a 1-1 ratio of 1 tablespoon cinnamon to one tablespoon sugar.

Dye Harder: A History of Red Velvet Cake

Part 2 1930s Forward

We know the original versions of red velvet cake were a chocolate cakes that used chemistry to give cakes a brown-red hue and had no other coloring added. But the idea of a bright red cake held the nation captive. In the 1920s, this children's story, about a bright red cake and a bright blue cake, began showing up in newspapers all across America.

The Evening Sun (Baltimore, Maryland) · 30 Dec 1926, Thu · Page 12

The Evening Sun (Baltimore, Maryland) · 30 Dec 1926, Thu · Page 12

The novelty of it was intoxicating for readers. Still, the idea of such conspicuously colored cakes was relegated to that of childhood fancy.

Let’s Get Artificial

Despite this, artificially colored food had been around for centuries. Colors were used to give foods and candies bright, attractive appearances but also to trick buyers. Added color was used by bakers in 1300s France to simulate the color of eggs. Today we still see things like this happen. Our sugar is bleached to look more white, apples are coated in colored wax to appear more appealing, candies are colored to be brighter and more eye-catching. (Palette of Our Palates: A Brief History of Food Coloring and Its Regulation)

These colors were not always safe. Ingredients like lead, to give a white color, and vermilion (which contained mercury), to give a bright red color, were both incredibly toxic. In 1820 Friedrich Accum wrote an exposé detailing the dangerous color altering practices of bakers and food manufactures. While his exposé was incredibly damning, not much came of it. Various attempts over the years and across countries were made to limit and regulate food coloring, but they went largely unheeded.

The first breakthrough for the United States was the Wiley Act of 1906. This allowed color manufacturing for the first time to be sold to civilians. But even with this law, colors were misbranded and not always safe to use. This led to tumultuous food coloring in the US until 1938 when the Food, Drug, and Cosmetic Act went into effect, enforcing the manufacturing of safe food colorings, which were then marketed successfully to consumers. Responsibility for regulating and enforcing the safety of color additives was transferred to the newly minted FDA. At that time, 15 synthetic colors were approved for use in foods, six of which are still used today.

Around this time things with Red Velvet cake got a little sticky, with many new developments.

Rumor of Red Cake

The rumor of a truly red cake began to sweep the nation. Stella Parks of BraveTart puts forth that the bright red cake became the stuff of legends in 1931 in, fittingly, the town of Vermillion, SD. Dalia Garratt, a home economics teacher for the University of South Dakota, gave an interview where she described the chemical reaction between the cocoa and the acid and the red hue it produced. Sensationalism what it is, reports of the science of red cakes became so exaggerated that people began to expect a bright “flaming red” cake, instead of the muted red-brown. (BraveTart 128-129)

WWII and Rationing

The US joined World War II and in 1942 the government began rationing. Limited availability of many items and associated food shortages became part of American wartime life. Staples such as sugar, dairy, and cooking fat, became harder to come by. Women, the primary cooks at home, had to get more creative with their ingredients in order to make them stretch. Pureed beets, for example, could be used in cakes and desserts as a substitute. Sugar beets have a naturally high sugar content and cut down on the amount of refined sugar required for a recipe.

The fiber in the beets added substance and helped the cake to hold together, reducing the eggs and white flour necessary. Additionally, sugar beets could be grown in gardens making them easier to come by. This substitution, when cooked correctly, also gave baked goods a beet red color.

Beetroot cake had been around since the late 19th century, typically paired with chocolate. Ingredients such as chocolate while not rationed, became even more expensive and harder to come by, cocoa powder on the other hand, was more affordable. This led to a rise in cocoa cakes being baked.

In the time of rationing and hardship, people wanted their cakes to have a special element that didn’t cost additional ration points or an exorbitant price. And as such, Lynn Chambers “popularized doctoring buttermilk-cocoa cake with a teaspoon of red food dye in her syndicated kitchen column in 1942.” (BraveTart 128-129) This gave the cocoa cakes a bright red color.

Waldorf Astoria and Eaton’s Department Store.

The Waldorf Astoria claims to be the original creator of the red velvet cake as we know it. Their own cookbook rather arrogantly states, “Many people think that Red Velvet Cake is a Southern invention and, although it has gained popularity there, it actually started out as a signature dessert at the Waldorf Astoria in the 1920s.” (Waldorf Astoria cookbook) This, as many historians have shown, is a bald-faced lie with absolutely no basis in fact. Not only do we know that red velvet cake existed outside of the Waldorf Astoria, but their own archivist also did not find a record of a red velvet cake at the Astoria until the 1930s. (New York Times)

While the Astoria was not the real creator of the cake, it did an excellent job of capitalizing on the popular dessert. “Indeed, it's credited with the creation of the cake, but as the research shows, they only capitalized on a cake that was already somewhat known throughout the country.” (Southern Living) Rumors began to swirl that a customer, so impressed by the novel red velvet cake, asked for the recipe. The chef obliged, but when the patron received their bill, they had an exorbitant charge for the cake recipe. The patron was said to have been outraged, and when denied a refund decided to retaliate by spreading the recipe as far as possible.

Historians and the Waldorf Astoria can agree on one thing: there is no record of such an event taking place. But the rumor on boosted the cake’s reputation and status, with the new name of "the $100 cake." The Astoria was not wanting for business. 

Eaton's department store in Canada was also credited with the invention of the cake for many years. Employees and patrons of the store believed that the cake had been created by store matriarch, Lady Eaton herself. This, too, has been proven false, but the legend lived on. (This is similar to the urban myth from the 1990s about a $250 Neiman Marcus/Marshall Field/Mrs. Fields’ Original Cookies chocolate chip cookie recipe.)

Adams Extract

But back to World War II and that brilliant red color. Adams Extract, a company that historically made food flavor extracts, had begun production of artificial food colors for home use, thanks to the 1938 Food, Drug, and Cosmetic Act. Faced with new production abilities but limited consumer resources, Adams Extract had to find a way to market their products to the American public.

Former employees of Adams Extract say that while trying to come up with a new marketing idea, the owner of the company made a trip to, you guessed it, the Waldorf Astoria. During this trip, he sampled a slice of their red velvet cake, and in true corporate fashion, decided to steal the idea and capitalize on it. (New York Times).

Adams Extract began producing recipe kits for a red velvet cake. These kits included a bottle of their artificial vanilla flavor and a bottle of their red food dye.

Adams 1940s Red velvet cake.jpg

Cream Cheese Frosting

The late 1940s saw the introduction of cream cheese frosting. Philadelphia Cream Cheese traces their first record of cream cheese frosting to a corporate cookbook that appeared in the late 1940s. Until that point, an ermine frosting was typically paired with red velvet cake. Cream Cheese frosting, however, was much easier to make. A simple whipping of cream cheese and powdered sugar produced a rich, tangy-sweet cover for the cakes, and it took all of 5 minutes to make. as opposed to a 15 or more minute effort to make ermine frosting, involving cooking and cooling of a pudding base, whipping additional ingredients, then combining the two without producing lumps. (New York Times)

African American Influence and Juneteenth

The annual Juneteenth holiday celebrates the emancipation of African American slaves. Red food has been the traditional food eaten for this day since it was first observed in 1886. Culinary historian Adrian Miller explains that red drinks and Juneteenth have their links to two West African Foods, the kola nut, and hibiscus. Afroculinaria also notes that to the Yoruba and Kongo cultures of West Africa, the color red symbolizes spiritual power and transformation. “The practice of eating red foods—red cake, barbecue, punch, and fruit– may owe its existence to the enslaved Yoruba and Kongo brought to Texas in the 19th century. For both of these cultures, the color red is the embodiment of spiritual power and transformation. Enslavement narratives from Texas recall an African ancestor being lured using red flannel cloth, and many of the charms and power objects used to manipulate invisible forces required a red handkerchief.” (Afroculinaria)

In his book “Soul Food, Mr. Miller delves into the importance and prominence of different red foods in African American cuisine. Red Velvet cake is not included here. In an interview with the New York Times, he explains that he was going to include it "until he realized it was a latecomer, showing up first in his research on African-American tables in the 1950s as a Christmas cake.” “I interviewed a lot of older people, and they just didn’t talk about red velvet cake in their childhood.” This is not surprising, since red velvet cake as we know it, including bright red food dye, did not begin to develop until at least the 1930s.

Additionally, the terms used to describe the cake were fluid until well into the 1940s. In 1948 Freda DeKnight published A Date with Dish: Classic African American Recipes. The book included a recipe for a red devil's food cake, which included cocoa powder and red food dye. This showed that dyed red cake was a part of African American home cooking culture within a decade of home food dye becoming readily available to the public.

While we will never be able to know for sure who put food dye in a chocolate cake first, or how the amount of cocoa decreased to its minuscule size today, it seems likely that, despite what large wealthy companies may take credit for, they were not the original inventors of the modern red velvet cake.

Back of the house kitchen jobs were frequently delegated to African American employees. While head chef jobs were given to (and are still held by) white men, at the Waldorf Astoria there was undoubtedly an African American staff behind the white chef. You can see this in their own cookbook, where pictures of the chefs are accompanied by their lower-ranking black employees. While that alone doesn’t prove exploitation, it works as evidence of a larger institutional pattern. I believe it’s plausible that an unnamed black pastry cook at the Waldorf Astoria brought a recipe for red velvet cake in as a new menu item and, as is the custom, all credit went to the head chef.

Even if this is not the case, it’s clear from history that dyed red velvet cake started as a way for struggling Americans to create a fun and extravagant looking cake within their means. From the ingredients they used to the shorter time it took to make, this cake was a product of a hard-working people with limited resources. Because it was attractive and delicious, the cake was then claimed by large corporations that appropriated the cake as a luxurious treat, a symbol of wealth and status.

1960s and Forward

Red velvet’s claim to fame did not last indefinitely, however. As the 1960s naturalist movement began, the artificial red became less alluring and red velvet cake fell out of favor with the American public. In the 1970s, James beard stated that the cake was "bland and uninteresting." (New York Times) The rest of America seemed to agree until the 1989 film Steel Magnolias was released; its now-iconic armadillo red velvet cake put red velvet back on the map

The newfound interest led to New York-based Magnolia Bakery to, in true red velvet form, capitalize on the cake. They started serving their own red velvet cupcake, using beets to give the cupcake its ultra red color.

By the 2000s, red velvet cake was back on the menu for upscale bakeries and events. But once a corporate gimmick, always a corporate gimmick. Red Velvet products began surfacing left and right. In 2009 red velvet flavored foods were 1.5 percent of all menu times. By 2013 it was 4.1 percent. And there are some pretty gross products out there. (New York Times)

Recreation

I didn't want to make a super red, red velvet cake, which is why I purchased the red gobs for the photos. I do not like using food dye in my cooking, and I hate beets. I have tried to make beet red velvet in the past, and to me, they all just taste like dirt.

Both Smitten Kitchen and BraveTart have recipes for a red wine red velvet cake. This seemed like a nice compromise to me to get a little added redness but still have a lovely cocoa cake. I liked different elements of each recipe, and so created a bastard offspring of the two for mine. I topped it with a mascarpone topping, but it would be delicious with either cream cheese or ermine.

Red Wine Velvet Cake

Servings: 24 cupcakes

Total Time: 45min

Ingredients:

2 sticks butter, room temperature

2 ⅔ cup light brown sugar (or white sugar plus 6-8 tablespoons molasses, depending on how dark you like it)

2 teaspoons vanilla extract 

4 large eggs

2 cups dry red wine 

3 cups flour 

1 cup natural cocoa powder (raw, if available) 

2 teaspoon baking soda 

¾ teaspoon cinnamon 

¾ teaspoon salt

Instructions:

1.     Preheat oven to 325. Line cupcake tins.

2.     In a large bowl, beat the butter, brown sugar, and vanilla extract until light and creamy. Once the color has lightened to a pale yellow, add eggs one at a time.

3.     In a small bowl, mix flour, cocoa powder, baking soda, cinnamon, and salt.

4.     Add the flour mixture and red wine to the butter mixture, alternating additions.

5.     Pour batter into the cupcake tins and bake for 15-20 minutes, until set. (They’re done when you can press gently on top and they spring back to shape immediately.)

6.     Allow to cool thoroughly. Frost with cream cheese, ermine, or mascarpone frosting.

Dye Hard: a History of Red Velvet Cake

Part 1: The Victorian era - 1930

Red velvet cake is the stuff of legends. Whispered tales and conflicting accounts follow it wherever it goes.  Today’s incarnation of red velvet cake, an electric red substance that may or may not have a subtle hint of cocoa and slathered with a thick cream cheese frosting barely resembles its humble beginnings as a chocolate cake. So how did it get to be this Franken-color hybrid? For that, we have to take a trip in our Wayback Machine to the origins of velvet cake. (Note that a color wasn’t associated with it yet.)

Velvet Cake

Velvet cake dates back to the Victorian era. According to multiple sources, a velvet cake is simply a cake that has a light, airy, delicate, velvety crumb. “Velvet cakes, without the coloring, are older than Fannie Farmer. Cooks in the 1800s used almond flour, cocoa or cornstarch to soften the protein in flour and make finer-textured cakes that were then, with a Victorian flair, named velvet.” (New York Times) In his 1873 book Dr. Chase Allen Woods describes the newfangled velvet cake:  “There is quite a tendency of late to have nice and smooth names applied to things as well as to have nice things hence we have Velvet Cake.” This description sounds just like…well…cake. But back in the Victorian era, not all cake was created equal.

While there were forms of cake that got their lightness from whipping air into eggs (pound, genoise, sponge), the only way to chemically leaven a cake was through yeast.  Pre-19th century, the line between cake and bread was blurry. Typically, cakes were distinguished from bread because they were sweeter and included richer aspects like butter and eggs. Additional ingredients such as nuts and dried fruits were included to give cakes an added sweetness and to make them a treat. However, as we see today, the distinctions between cakes and breads were flexible. Today, we may classify desserts such as panettone or brioche as a bread, whereas a traditional fruitcake is a cake. In the 19th century, all of these could have been cake.

Yeast raising made these cakes incredibly labor-intensive, frequently taking more than a day to get through all of the proofing. Additionally, yeast did not come in little packets as it does today. In fact, it wasn’t until 1861 that microbiologist Louis Pasteur published his discovery of yeast. (Fun Fact: His work on killing unwanted organisms in wine also led to the creation of pasteurization.) Bakers needed a mother yeast strand, typically in the form of uncooked starter from a previous baking project or from the yeast taken from beer and other fermented drink or risk the flavor of a wild yeast strain. (Wild yeast is gathered simply by making a wet dough or batter from water and flour and leaving it sit to allow the wild yeast to find the space to grow. Environmental factors are important; it can't be too hot, too cold, or too dry or the wild yeast won't be available or won't prosper. And the flavor is highly variable.) Bakers were desperate for a way to replace yeast rising with something faster and more consistent.

The first attempt at a leavening substitution was potash (AKA pottasche, pearlash, potassium carbonate, salt of tartar, or carbonate of potash). Potash is a product made by pressing water through wood ash to create lye and then evaporating the water out. At first, it seemed to be a good substitute. However, it was known to leave an often-undesirable smoky flavor. Potash also didn't interact well in foods with a high-fat ratio (such as cake) as it would leave behind a soapy taste. As the Spruce Eats points out, this is unsurprising, as the two main ingredients in soap are lye and fat—a fact I learned from Fight Club.

In 1846, baking soda happened. Baking soda, when combined with an acid, such as vinegar, produces carbon dioxide. When used in a batter, you get a cake that has instant leavening with no soapy or ashy aftertaste; it was an immediate hit. We still use baking soda today for baking, cleaning, and science projects. It is a wonderful ingredient! The only drawback is that for it to create its bubbles, you need a reliable source of acid. While today store-bought buttermilk and vinegar are consistent in their acidity, it was hard to be sure in the mid-19th century just how acidic your buttermilk was, or how strong a reaction you would get.

Enter baking powder. In 1856 the first viable baking powder was patented in the US. Made from an extracted acid compound and baking soda mixed together, baking powder was truly a “just add water” product. When incorporated into any liquid, the baking soda and the acid in the powder would react with each other, causing carbonation. 

These products gave rise (pun intended) to the then entirely new genre of velvet cake.

When velvet cakes first came on the scene, they still contained many of the added flavors and ingredients of the bready cakes of yore. They would include things such as nuts and dried fruit for sweetness.  They were baked in long pans that we would now consider loaf bread tins.

Gradually, however, added sugar, sweet frostings, and fillings that we consider traditional to other forms of the different popular types of cake began to take over as the main sweetening agents. One of the first, and still most popular additions, was chocolate. Chocolate was very expensive, so initially, “chocolate cake” meant a yellow cake that had chocolate frosting or filling.

 The Red Color

Chocolate began being fully incorporated into cake as early as 1781 (Brave Tart) but didn't start to become really popular until 1893 when the April issue of Table Talk published a recipe for a fully chocolate "Devils Cake!" This was a moist, decadent cake consisting of a paste made from chocolate and boiled milk, and people began to incorporate chocolate into their cakes. Chocolate was still expensive, however, and as time went on, substitutions for the cheaper cocoa powder began to be made.

In 1911, the first recipe for “Velvet Cocoa Cake” with a thick boiled brown sugar frosting appeared in the Ohio Telegram.

Just a few years later, in 1914, the same recipe started showing up in newspapers across the US, and a craze had started. Through the nineteen-teens and twenties, the chocolate cake craze only continued to spread. And people began to comment on the red-brown color these cakes sometimes turned. But not all the chocolate cakes turned red. Recipes spread, and the tale of red cakes grew in popularity through the 1920s. People all across the United States wanted to try their hand at making not just a chocolate cake, but a red cake.  And at this point in the research, so did I.

The Re-Creation

The red or "devils" moniker came from a combination of using red sugar (brown sugar), and the red-brown hue the cake would take on when the chocolate and acid combination interacted. Chocolate, particularly raw cocoa powder, naturally contains red anthocyanin in it. When combined with an acid, it intensifies the anthocyanin notable red coloring. Coincidentally, this level of acid either from vinegar or buttermilk, was also necessary for baking soda to activate. This meant that cocoa cakes that used vinegar and baking soda as opposed to baking powder had a more noticeable red color.

Since names such as red cake, cocoa velvet, devil cake, and devil’s food, began to be used interchangeably, It is important to set up the distinction between a devil's food cake, red velvet cake, and other varieties. While the styles are all similar, there are important distinctions.

For this purpose, a devil’s food cake is a cake that traditionally involves brown sugar and chocolate, giving a deep black color. By contrast, a red velvet cake must be made with cocoa powder, an acid liquid such as buttermilk, and baking soda as the leavener, all reacting to give the cake a rich red-brown color. 

This important distinction helped in sifting through the old recipes and figuring out which ones count as “red velvet” and which are simply chocolate cakes.

I searched through several recipes, including one recipe from 1915 actually calls for fermenting the baking powder leavened cake overnight to produce a genuinely red color. 

This recipe from 1924 mentions the chemical interaction that gives its cake a red color.

I settled on a 1927 recipe, first appearing in the Richmond Item, for “Red Devil’s Food.”

While its title is that of devil's food cake, it carries all the hallmarks of red velvet. The recipe uses a buttermilk and baking soda base and gives the baker the option of cocoa powder and chocolate. It even calls for topping it with a traditional ermine (boiled milk) buttercream frosting. The recipe also had some of the most specific instructions for baking, actually giving a baking time and temperature, a true luxury when you work with old recipes.

I opted to use cocoa powder when making this recipe. I used raw cocoa powder, as it has the highest amount of anthocyanin. I was lucky and actually managed to find a large bag of raw cocoa at Costco. Still, Costco giveth, and it taketh away; you never know if they’ll have a product the next time you come to the store. If you are at the grocery store, a basic cocoa powder such as Hershey’s will do; it just won’t result in as deep a red color. But be sure your cocoa powder isn’t a Dutch or ‘special dark’ cocoa powder. There are important differences between the raw, processed, and Dutch. Raw cocoa powder is made from the raw, unroasted beans that have been crushed and had the cocoa butter removed. Heat has never been applied to it, which is why it retains the most anthocyanin. A typical processed cocoa powder, such as Hershey’s, has been roasted during the process, removing some of the anthocyanin and the resulting less red color than raw cocoa but leaving most. Dutch press, or ‘special dark’ cocoa, has gone through an alkalizing process, which gives the cocoa powder a much darker tone and prevents it from reacting with the baking soda because it has already been alkalized, so it will give a cake little to no red color. 

Raw vs Dutch Cocoa

Raw vs Dutch Cocoa

While the recipe I used is for a layer cake, I had my one-year-old son's birthday coming up, so I opted to make them as cupcakes and serve them at the party. The recipe transferred beautifully to cupcakes, and the cake was incredibly good. For…ahem…research purposes, I also made a batch of straight chocolate cupcakes. When placed next to each other, the red color is starkly noticeable. 

Red Velvet on left, chocolate cupcake on right

Red Velvet on left, chocolate cupcake on right

These red velvet cupcakes were tender and definitely had a velvety crumb. They also had a noticeably more chocolate flavor to them than a modern red velvet cake. While this cake contains 1 cup of cocoa powder, many modern red velvet cakes contain as little as 2 tablespoons of cocoa powder. That is more of a cocoa “blessing” than a cocoa flavor, in my opinion. The cocoa flavor is replaced by a truly exorbitant amount of red food dye. More on that in Part 2.

I topped my cupcakes with the recommended ermine frosting. I had never made it before, and it was absolutely delicious. It was lighter and less sweet than its American counterpart, more consistent with that of meringue buttercream. And while it is similarly labor and time-intensive to make, it is significantly less finicky, so I was able to do other things while making it. These cupcakes and frosting were a big hit, and I would definitely make them again.

Join us next time, for red velvet 1930-modern day featuring artificial coloring craze, racism in America, and corporate takeover. Red Velvet – Dye Harder

1927 Red Velvet Cake

A soft tender crumbed cake adapted from a 1927 recipe for “Red Devils Food.” This cake pairs well with an ermine frosting.

Servings: 24 cupcakes

Cook time: 10 min prep, 20-30 bake

Ingredients:

1 cup room temperature butter

2 cups of sugar

4 eggs

3 cups flour

1 tablespoon baking powder

1 teaspoon salt

1 cup buttermilk

1 cup boiling water

1 cup of cocoa

2 teaspoons baking soda

2 teaspoons vanilla

Instructions:

1.     Cream butter and sugar together.

2.     Add eggs.

3.     Mix flour, baking powder, and salt. (three times as per the incredibly specific recipe)

4.     Alternate adding the flour mixture and buttermilk to the creamed butter and sugar.

5.     Pour boiling water and cocoa together. Mix quickly.

6.     Add baking soda and mix until thick.

7.     Cool slightly, then add to cake.

8.     Mix thoroughly and add vanilla.

9.     Bake at 350 for 30 min as layer cake and 20 min for cup cakes.

Stay Puffed My Friends Part 3: America

The history

In the late 1800s, marshmallow root began being phased out of the recipe altogether and was completely replaced with gum arabic. The marshmallow root had a distinctive flavor that not everyone enjoyed; substituting the more neutral-flavored gum arabic for it led to a cleaner sweet taste (Eléments de Pharmacie théorique et pratique). Additionally, gum arabic produced a similar medicinal effect when it came to treating ailments like a sore throat or cough because it also had mucilage in it. Between the gum arabic and the starch mold mogul marshmallows were almost the perfect confection. There was just one problem: gum arabic was still an expensive product.

Initially, there were no viable alternatives to gum arabic. Gelatin was very popular in cooking due to its nutritional value, especially for the French during the Napoleonic wars (What’s Cooking America).   However, during this time, it was a very laborious process to extract gelatin, as it required a lot of boiling and waiting, not unlike the process of extracting the sap from marshmallow root. Gelatin also had a very distinct flavor profile, making it unsuitable for desserts at the time (What’s Cooking America).

This all began to change in 1845 when two different companies developed patents for powdered gelatin. The J and G Company in Edinburgh, Scotland, patented a pre-packaged, unflavored dried gelatin, while American Peter Cooper patented a ‘portable gelatin’ powder (What’s Cooking America). These ready-made—just add water—gelatins were not an initial hit. It took until the end of the century for people to begin using these gelatins and realize their value for desserts.

It wasn’t until 1894 when yet another refined gelatin product was on the market that things finally changed. Charles Knox, of what would become Knox Gelatin, developed refined flavorless gelatin that was produced in sheets (What's Cooking America). This resulted in a superior product, and the use of dessert gelatins began to take off.

In the late 19th century, the concept of “marshmallow” began to be associated with meringue, not the marshmallow plant. By this point, no marshmallow root was involved in the production of the marshmallow candy. Recipes for marshmallow cream, marshmallow frosting, and other such desserts began to show up in cookbooks by the late 1800s, such as this 1895 recipe for marshmallow cake:

Here we can see “marshmallow” is more a reference to the food’s fluffy white appearance and texture than a reference to the root of the marshmallow plant. These recipes are, at their base, meringues.

At this time, marshmallows were being made with less and less marshmallow root, especially in America. By the early 20th century, it was not uncommon to see marshmallows with no actual marshmallow in it at all. Once it was discovered that you could replace the distinctively (and, some would say, offensively flavored) marshmallow root with a flavorless alternative that was also less labor-intensive and expensive to produce, the marshmallow plant was completely pushed aside, and the sweet marshmallow-less confection began its climb into the heart of America.

Marshmallows were reportedly first mass-produced in America by Joseph B. Demerath, founder of the Rochester Marshmallow Company. The Rochester Marshmallow Company began in 1895, pre-dating the marshmallow craze of the 20th century. While it is impossible to say whether this factory was the root cause of the sweet's popularity, it was definitely a contributor. The factory's production, using the starch mogul method, allowed marshmallows to be mass-produced and distributed all over the region, making marshmallows cheaper, and more easily accessible (The Nibble). By the turn of the century, copycat companies were popping up, and marshmallows were being sold as penny candy all over the country. This was one of the first times the confection was being sold exclusively as candy, and not as a medicine.

Americans loved the softy, chewy confection.  And once the marshmallow began to gain popularity in the 20th century, their love, which some might deem excessive, began to show through. This was when things began to get weird. The marshmallow started to transform from a food in its own right to an ingredient in other foods, with some genuinely disgusting results, showing up in some distinct recipes that might give modern-day consumers pause.

In a 1913 edition of Table Talk, a cooking magazine, an article by Eva Alice Miller, appeared titled, "Marshmallow Mixtures." The article was about the incredibly versatile things you can do with marshmallows. These ranged from the sweet recipes that almost make sense—marshmallow on half shell (a pear dessert), marshmallow fruit salad, marshmallow almond whip, and the classic toasted marshmallow—to the truly repulsive marshmallow omelet, which as the name describes, is an egg-based sweet omelet (gross).

In 1924, Mary Chambers published Breakfasts, Luncheons and Dinners: How to Plan Them, How to Serve Them, How to Behave at Them—a Book for School and Home.  Within the text was a recipe for a shepherd’s pie with a marshmallow crust (even worse). While I have not eaten meat in nearly two decades, I just cannot imagine this was a pleasant combination.

The travesties of cooking didn’t end there. In 1927 with the rise in popularity of marshmallows, the California Lima Bean Council decided to hop on the “disgusting marshmallow recipe” boat. The Council ran ads featuring a dish of baked lima beans topped with bacon and marshmallow, with the promise that “you’ll like them even better served these tempting ways” (seriously, who thought this was a good idea). This was truly a troubled times time for marshmallows and cooking in America.

It wasn’t all bad, though. The same year a marshmallow cultural icon was born. The 1927 book, Tramping and Trailing with the Girl Scouts, featured the first recorded recipe for the “some more,” so named because it leaves the eater wanting some more. The classic recipe of graham crackers, chocolate, and a toasted marshmallow is still a staple in Scouting events, camping trips, and summer campfire gatherings.

The 1930s also saw the rise of another modern-day seasonal American favorite, the sweet potato casserole.

Marshmallow eventually graduated to the main course. Sweet potato with marshmallow topping still makes annual appearances on thanksgiving across the land. In a 1930s variant, the clever hostess would surround a marshmallow center with a mashed sweet potato patty, roll in crushed cereal flakes, and bake.
— Candy: A Century of Panic and Pleasure 149

While this sweet main dish claimed a spot on many American tables, today's version is usually more of a casserole-style. It typically includes cubed, or lightly smashed sweet potato, sometimes with the addition of cinnamon sugar, maple syrup, or nuts, and topped with marshmallows and baked until the marshmallows are soft and golden.

The next great marshmallow manufacturing innovation came in 1948 with the invention of the marshmallow extrusion process. In this process, marshmallow is forced through a tube in the desired form and cut into pieces. The individual treats are usually still coated in starch to allow them to set better and to decrease stickiness. This process allowed production to become even more efficient and is what gives contemporary cylindrical marshmallows their shape. This is the same process companies such as Jett-Puff still use today (Campfire Marshmallows), providing the inexpensive, sweet treat to people across the USA.

Some might define Americans’ obsession with marshmallows excessive. In fact, the 2014 edition of the Oxford Companion to Food does just that.

[marshmallow] is a versatile substance, which displayed its versatility to maximum (some would say excessive) extent in the USA in the 1930s to 1960s, when it occurred surprisingly often in recipe books, for example as an ingredient for salads, in fillings and toppings for cakes and desserts, and as toasted marshmallows, crisp outside and melting soft within.
— The Oxford Companion to Food 497

It is true that Americans’ obsession with the sweet treat is astounding. On average, Americans consume 90 million pounds of marshmallows each year (National Confectioners Association). The town of Ligonier, Indiana even hosts an annual festival entirely centered around marshmallows. The marshmallow is also a treat loved and consumed throughout history and across different parts of the globe. While the confection today is different from its predecessors, its sweet, sticky hold on people all over the world will never cease.

The Recreation

I had lofty aspirations for this recreation. I am vegetarian, and I had dreams of finding a simple, few ingredient recipes for vegan marshmallows, which I could share in triumph with the masses.

That is not what happened.

The modern marshmallow is noticeably different from its predecessors, both in look and texture.

Honey Marshmallow, Pate de Guimauve, Gelatin Marshmallow

Honey Marshmallow, Pate de Guimauve, Gelatin Marshmallow

While the honey marshmallow candy is dense with just a little chew, pâte de guimuave is noticeably lighter and fluffier. It does, however, retain a bit of its wetness. It pulls apart, and even when coated with powdered sugar, can still be sticky (were I to make it again, I would pipe them individually to allow a skin to form on each piece). It does not hold its form, and when cut can slump. All this in comparison with the modern, gelatin marshmallow-free marshmallow. They are fluffy, yes, but also firm. They squish but break when pulled apart.

I tried many techniques to achieve this. One was to use the pâte de guimuave ingredients but a modern marshmallow technique (pouring the hot sugar over the egg whites in a stand mixer.) I subbed out marshmallow extract, for powdered marshmallow root. It worked really well and took less time. But you end up with a pate de guimauve style marshmallow, not a modern one. And spending $13 on gum Arabic for each batch is cost-prohibitive.

I next played around with modern marshmallow recipes, subbing in Agar-Agar, to no avail. The agar-agar simply does not have enough hold.

I tried subbing in aquafaba for egg whites and doing a meringue-based marshmallow. Again, it kind of works, but you end up with a dense marshmallow and still need additional stabilizers.

Finally, I was forced to admit it. There is no easy vegan substitute for the marshmallow. Gelatin is the perfect binder. It is a stabilizer and a protein. It takes the place of the egg whites and the gum and does the job better. Unflavored gelatin is truly a marvel of modern food technology. And it is cost-effective. A pack with enough gelatin for two batches of marshmallow only cost two dollars.

That being said, working with gelatin, something that as a vegetarian I have literally never done before and doubt I will ever again, felt more like a science experiment than cooking. When you use gelatin powder, you have to "bloom" it. Soaking it in water to activate it. It takes only a few minutes, and the entire thing turns to a hard gelatinize mass. This is what gives you the base for your marshmallow. I found that when cooking it, I noticed a smell (my meat-eating husband did not). And the mixture before it cooled, seemed unnatural almost like a shaving foam. It was, however, straightforward to work with.

A basic marshmallow is very easy and only contains three ingredients:

  • Sugar

  • Water

  • Gelatin

A pinch of salt and vanilla extract helps round out the flavor as well but isn't strictly necessary.

Once you bloom your gelatin, you mix it and your water and sugar in a pan, bring the contents to a boil on medium heat and cook until your liquid reaches hard-ball stage or until when a spoon is dipped in, a long thread comes out. I thought this part would be more finicky than it actually was. Mine technically never reached hard-ball stage but turned just fine. And I saw many people who barely took theirs to soft-ball and also turned out okay. The forgiving nature of gelatin.

Pour the entire contents into a stand mixer and beat for about 10 min. Pour onto your surface, or into a pan. It will be stiff, so I put a little oil on my hands and patted it down to form a more even hunk.

That's it. That is modern marshmallows. Quick. Easy and relatively painless, though not vegetarian or vegan.

I did find a great recipe for vegan marshmallows, though.

Here is what you do. You go to Trader Joe’s. Go to the packaged goods section. You buy their marshmallows and use those instead. That’s it.

Are there recipes for vegan recipes online? Yeah. Of course. And some are good. But the number of ingredients you need just isn't worth it. Buy the Trader Joe’s ones.

Or make these all sugar gelatin filled marshmallows.

Leaning tower of marshmallow

Leaning tower of marshmallow

All sugar marshmallow

This is a simple, easy marshmallow recipe. You will get light, fluffy marshmallows each time.

Cook time: 20 min active, 3 hours cooling

Servings: 24-30 marshmallows

Ingredients

  • ½ cup water + 2 tablespoons Gelatin

  • ½ cup water

  • 2 cups of sugar

Optional:

  • Pinch salt

  • ½ teaspoon flavoring extract

And/or

  • 2 Tablespoons Cocoa powder

Instructions

1.     Prepare a marble slab or baking sheet by sprinkling it with powdered sugar or starch. If using a pan, coating with oil first helps to coat the sides with powder.

2.     Combine ½ cup water and gelatin in a small container.

3.     In a medium pot, mix sugar and, if using, cocoa powder. Pour in gelatin mixture.  Then add an additional ½ cup water. Bring mixture to a rolling boil over medium heat.

4.     Boil until the mixture reaches hard-ball stage.

5.      Once the mixture reaches hard-ball stage, pour contents into the stand mixer. Beat on low for 2-3 min, then turn up to high heat until mixture has at least doubled. About 10 min.

6.     Using a ruby spatula, transfer contents to starch covered surface or pan. If large peaks form and do not level out, put a little oil in your hand, and gently press down to create an even surface.

7.     Allow the marshmallow to set for at least 3 hours. Then cut and toss with additional starch or powdered sugar and save in airtight containers.